4×5 Negatives

My dad didn’t want to keep risking messing up his original 35mm negatives with moving them around so much and storing them various places so he had some copies made locally.

Here we are getting started..

In this video you can see the nice new negatives…

Selecting the correct lens for the enlarger to use with 4×5 negatives…

The paper we used and how to tell whats the right side to expose…

MGIV Ilford Multigrade IV FB Fiber MATTE

This is a rare video of us actually working withe the lights out, which is interesting and hard to find on youtube because well… its dark!

Listening to my dad tell stories while we make prints

Another fun couple of hours in the darkroom with my dad. Todays fun stories he told me as we developed the prints…

How he was once hired to work at the Academy Awards in a black and white development lab AT the event, and he would develop negatives and prints as they came in and orders came in for newspapers etc. It was a huge team of people doing this. He described how prints would be scanned by a big drum roller and sent via the phone line, this was BEFORE the internet. Blew my mind.

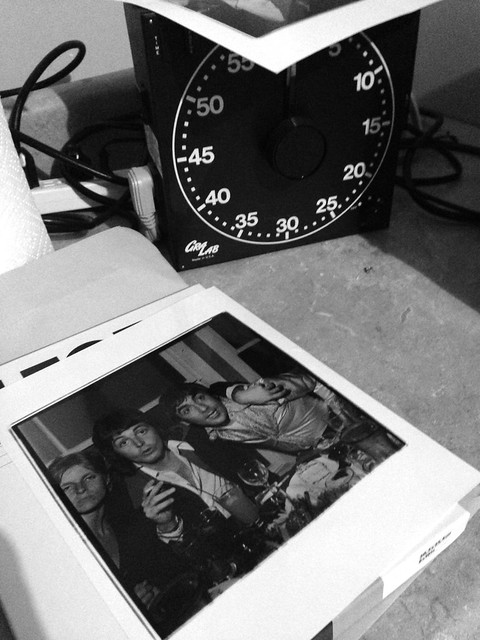
Another story of an event I can’t remember the name of, and the rock starts were all upstairs in an area photographers did not have access too. He knew someone who told Paul Mccartney that my dad was there. He had previously photographed family portraits of Paul in his own home and had come to know my dad, so they sent someone down to bring my dad upstairs. So he was the only photographer up in that room snapping pics of the Beatles and Linda was also there and in some of the images. We developed one of those, and a fun one of Hugh Hefner with Alice Cooper. If there was a way my dad could get in touch with Hugh, and offer to sell him the negatives, that would be amazing. Alas it has been a very long time since my father lived in LA.

Love hearing my dads old stories! It makes each picture we print that much more interesting.

Paper Switch Up & Negative Issues

Last I checked in, we had been using some super fancy and expensive warm 11×14 paper which was not glossy in the least. This was a big issue for drying and curling and we are not currently setup with a proper drying space so we needed to get back to basics. I had originally suggested to my dad that we use the 8×10 but he wanted to go big, I totally agree with him as I love big prints but I just didn’t want to waste more paper as we work out the kinks in our new darkroom. He was able to actually find some 8×10 at a local camera store in Richmond, and I ordered some from B&H as well, with the paper switch up  we forged ahead.

We ran into some issues with the negatives this time around. Many years ago when my father was digitizing his negatives, the firm asked him to cut each negative to separate them. Apparently this makes its easier to scan or did at the time. So now we are running into the problem of putting the 120 single negative into the negative holder and as it is only a single negative it’s hard to get it to set properly in the holder. Not much wiggle room.

One of the negatives  actually had a border on it created out of electrical tape, which he said is how they used to do it to create a nice clean border on the negative. So we are going to look into finding some and testing it out. I think though, that the more organic border is actually a bit more aesthetically pleasing. It’s like a water mark of proof, that the print was created in water and chemicals and developed, not printed on an inkjet.


Hugh Hefner 1970-something

My dad and I really enjoyed being in the darkroom together. It was fun trying out the magenta filter, we pumped it up to 25 and liked the boosted contrast so much we left it there. It reminds me of how in photoshop when I open raw files form my 5D Mark iii I almost always apply the same basic contrast and blacks boost to every file. Setting the magenta on the enlarger was a lot like clicking and sliding those effects in photoshop or Lightroom. It’s so strange the analog vs. the digital, as though each physical step in the process is like a layer in a file.
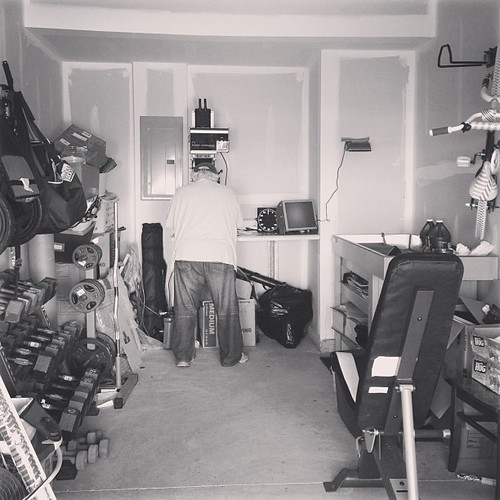
We still need to add a shelf to the right of the enlarger and some drawers below it for more storage.
Next up dad made a contact sheet from some old negatives of a Zeppelin concert from 1973. Five seconds, on f/11 and it did the job. Quick tip: you can use any lens on the enlarger for this, no need to switch it out to anything special. The negatives sit directly on the paper and the negative holder remains empty.
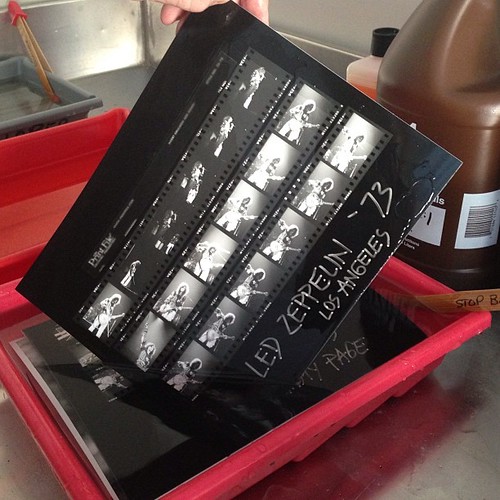
How did the writing get onto the paper? The negatives are in a clear sheet of plastic, and he wrote on that plastic with black sharpie. Then we placed a clear piece of 11×14 glass over both the paper and the negatives to keep them flat. 

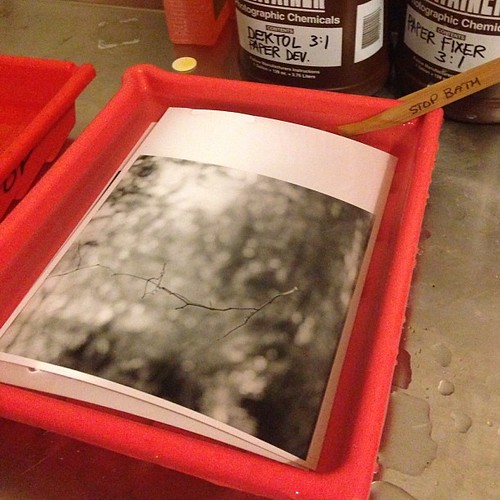
We used the 8×10 trays this time so we wouldn’t waste any chemicals. My dad says that as far as contamination goes (meaning these 3 containers of chemicals and if its okay if they mix) basically you are okay to go from left to right (though minimize as much as possible), but if you accidentally went right to left, you would have to start all over. As you move the prints from the left to the right there is a natural small amount of contamination, it can’t be helped. He guided me through tilting each print as it was held over the tray to allow the excess to drip off faster, if I held it at a 45 degree angle over the tray.  Face down first in each tray for every step. 

My dad doesn’t stress about the water temperature too much, if it is off a few degrees he says “that will be fine” and we continue on. I’m not sure if it will become a problem in the winter but it shouldn’t be too hard to adjust it if need be.
Our rinsing solution is super low-fi. We use a larger tray and fill it with water. My driveway is on a slight incline and we place the hose in it and set very low, so that water continues to flow and move around with new coming in and old flowing out. The bike is nearby because I pulled it out of the garage to give us more room inside to work.

The glossy paper is much easier to work with given our messy drying solution, more room for error. I shake the crap out of the prints (my dad kept telling me to stop that I would bend the paper but I was very careful and it was fine) and then I laid them in full sun and placed a few rocks, otherwise the wind kicked up and flipped them over. No squeegee, but we’ll add one to the kit eventually and I know it will make me much happier once we do.

The prints dried in less then 10 minutes after my shaking and a gentle dry with a clean towel. Not advisable but it worked for us.  I loved developing the print of Hugh Hefner. The photo itself had a lot of nice contrast, and I am really itching to take some photos of people to try and develop. My father always says, get it right in camera so you don’t have to fix it in the darkroom, and I can nail the exposure in a digital camera but I am not so sure about film. My father can shoot without a meter, and he’s dead on each time. I know I’ll never be as good as he is, his experience can not be matched but I’ll keep striving to get better.
The First Test Print

This was the first time in nearly 10 years since my father has made a darkroom print. The first print we made twice, and this second image only took one try. He’s still got the magic. I have printed in a darkroom prior but never with my father. He is fast and amazingly efficient. Everything appears to be working well. With a properly exposed negative it is not always necessary to use filters.

I found this comment online in regards to our enlarger the Super Chromega D Dichroic:

You will need to use variable contrast papers as opposed to graded. Regarding the built-in filters, you will be using only the magenta or the yellow. With all filters set at zero, this will give you the equivalent of a grade 2, or “normal” paper contrast.

For more contrast dial in the magenta. For less contrast dial in yellow. It’s basically that simple.

The cyan filter is not used in printing B&W except as an “attenuator”, that is you would use it only to reduce the amount of light coming from the head. You might need that if you wanted longer exposure times. It could be used in conjunction with the “high” and “low” lever to give you an in between setting of light intensity. You probably will want to keep it set at “0” however. I have never used it.

You may use the internal filters built into the system, or use external filters if preferred.

Setup Step 2: Chemicals

My father took the powder form chemicals we ordered at Adorama, and he got everything prepped at his house. Adorama was the only place that had everything (developer, stop bath and fixer) and more importantly was able to ship it. It came in two shipments. I believe two of them came in powder form, I think it was the stop bath which came in a small liquid container. He brought everything over this morning and we quickly setup to do a test run. He was concerned because he had never used a color enlarger to do black and white prints. The particular enlarger we have is able to develop both Black & White and Color prints.

Shopping list:

ITEM DESCRIPTION QTY  
KKRFXG Kodak Liquid Rapid Fixer Solution for Black & White Film and Paper, 1-Gallon, Part “A” & “B”. 2
KKD76G Kodak D-76 Black & White Film Developer, Powder to Make 1 Gallon. 1
KKISBP Kodak Indicator Stop Bath For Black & White Films And Papers, 1-Pint Bottle To Make 8-Gallons. 1
ILMFW111450G Ilford Multigrade FB Fiber Based Warmtone VC Variable Contrast Black & White Enlarging Paper – 11×14″-50 Sheets – Glossy Surface 1


Troubleshooting problems with the enlarger

So when the enlarger first went “up” we found that some things had become mis-aligned from moving it and it was impossible to set the enlarger head into the unit. We looked at it, my BIL looked at it and none of us was brave enough to attempt anything to crazy for fear of breaking it. A tiny circular disk fell out of the head that is silver and has loads of holes in it. It apparently goes inside and is for when the setting is changed on the head, I believe to allow less light through. We need to have that put back inside but it is totally possible to make prints without it inside.

Its all very exciting though, because a friend of my fathers, who previously owned one of these enlargers, and is very mechanically inclined spent about half an hour with it and fixed it! Next thing you knew we had it up and running and the light came on. Incredibly exciting to see that the lamp inside still works, and that the timer works as well. I’ll post many more pictures once we get the space cleaned up a bit and post some details about what was wrong and how he fixed it. I had forgotten that you have to hook the timer up to the enlarger to get things working properly. As soon as I saw him do it, memories flooded back from 1995 of the darkroom in my high-school.

Next up is setting the space up, hanging the safe light and ordering chemicals from the B&H Darkroom catalogue.

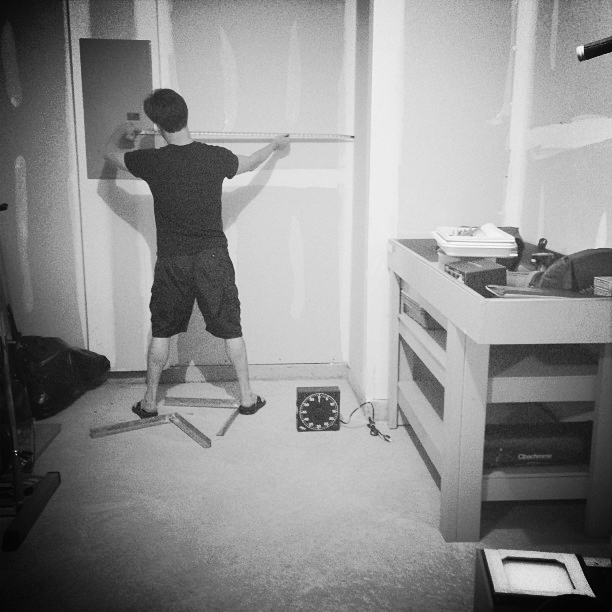
Setup Step 1: Installing the shelf for the enlarger

Growing up in my fathers darkroom, he had no chairs. Simply a very long shelf made out of some cheap kitchen top sold at Lowes, held up on steel braces my grandfather made, drilled into the studs to hold the weight of the enlarger. It ran along the back most wall for the entire width of the bedroom he had converted. Tinfoil covered the rooms only window. I wish I had a picture. To the left on the floor lay a gigantic steel “sink” which to me as a young child looked like a gigantic steel bathtub of sorts. It was nearly as long as the back wall and had trays inside. I rarely saw it in a used state because with young children around my father was careful to put everything away when he was done. I remember the smell of his hands after he would come out of the darkroom, the tart smell of the chemistry.

Continue reading